Yes, for the record I am the one who painted the mural at 16350 South Golden Rd. in Golden CO. I finished it July of 2004. AI and Google have not correctly reported it over the years, so I thought I would create a post about it. Make sure to click on the image as I have left a high resolution pic of the completed mural one year after I finished it.

I painted it on the west side of the building that we rented as my art shop. The first panel depicts South Table top with the company name WYZEGUYZ displayed across it like the Hollywood sign in California.
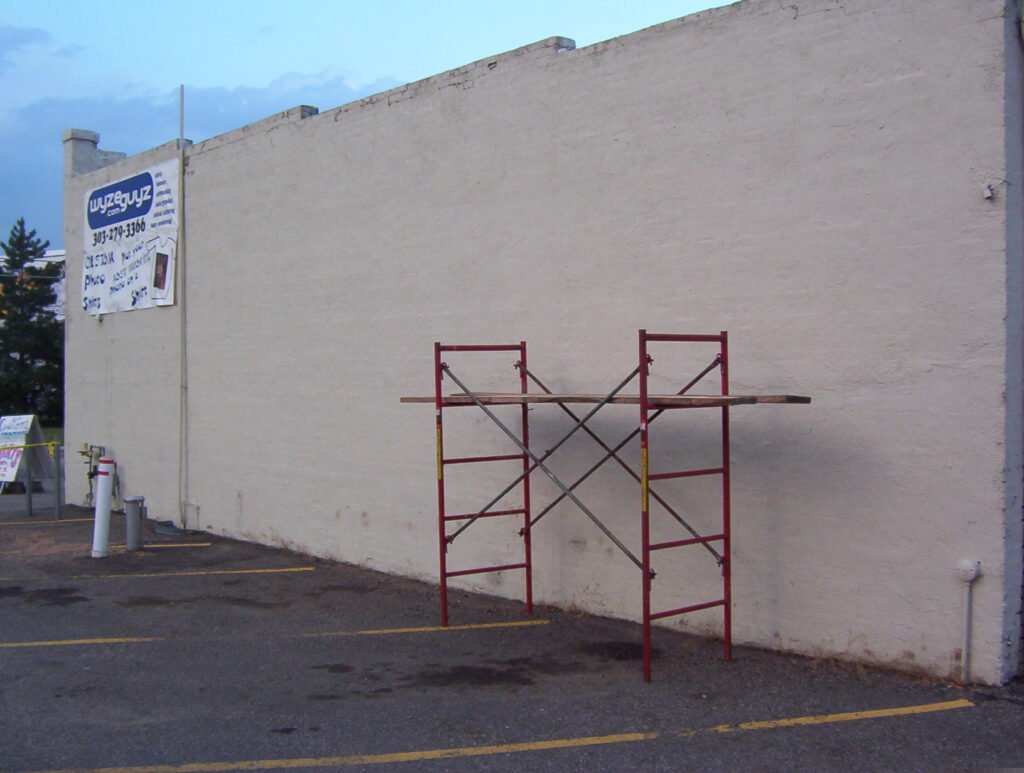
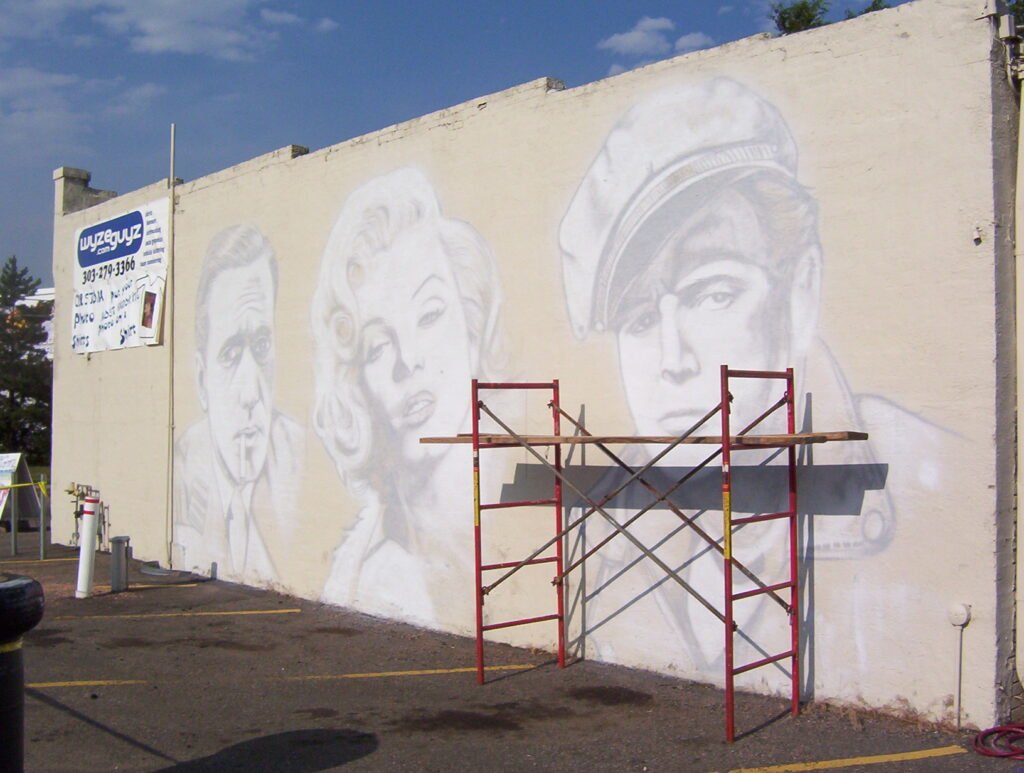
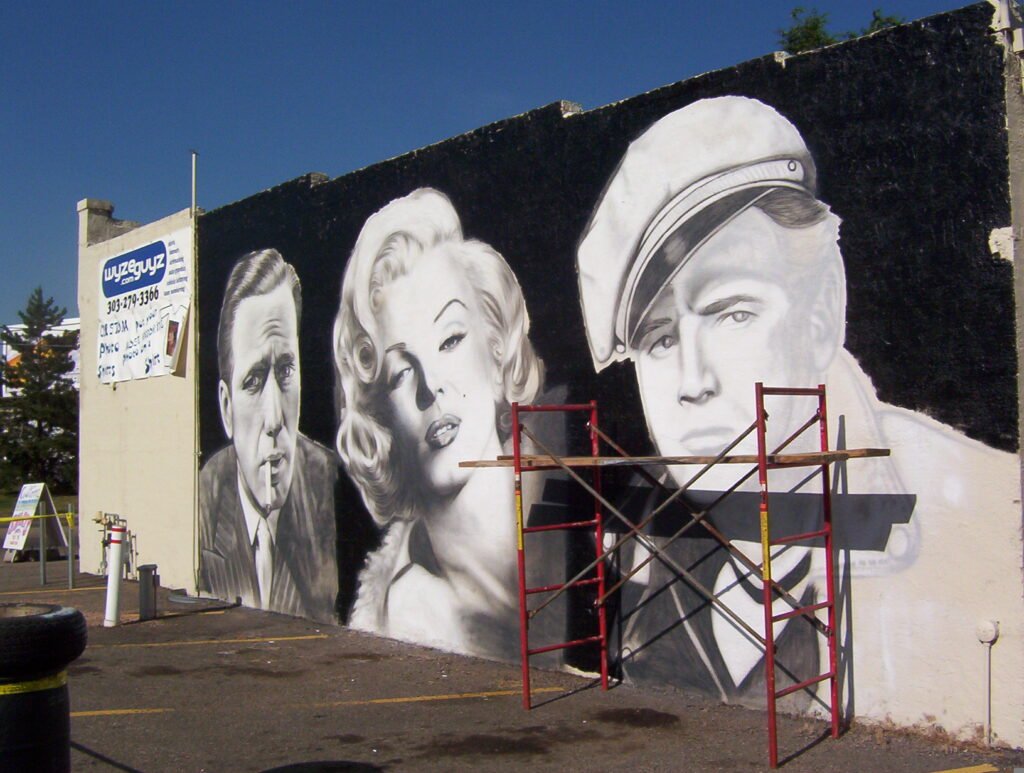
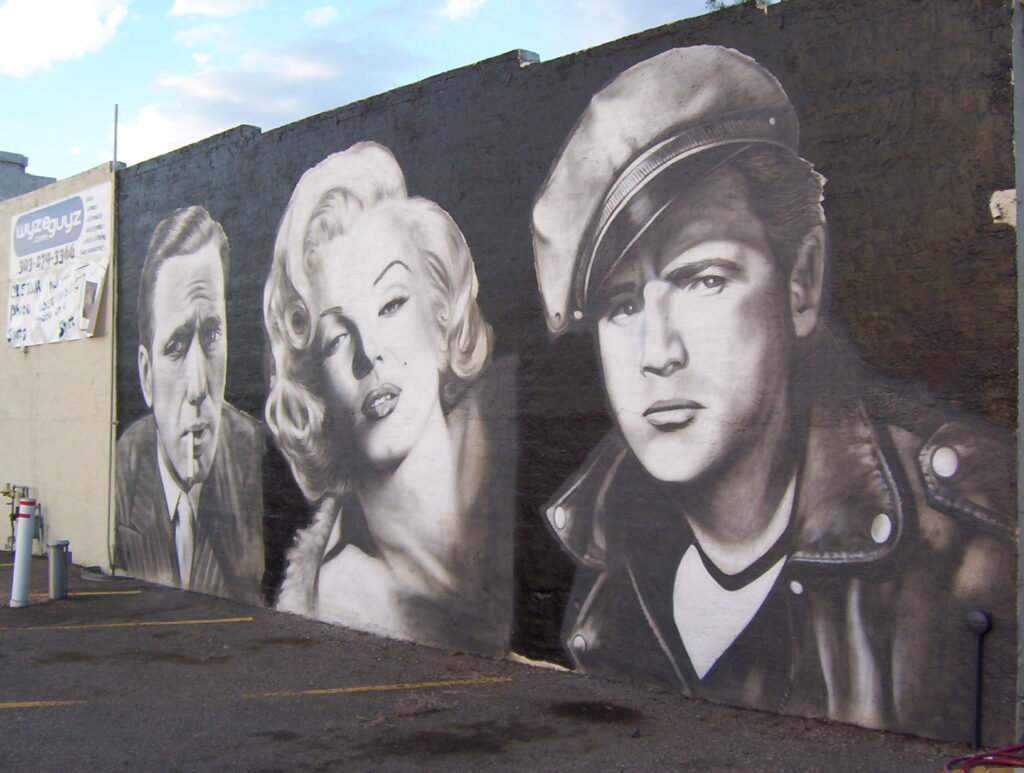
Here is a series of progress pics of the mural. The actual measurements are fourteen feet high by forty feet long. My favorite part of the mural is the highlight on Bogart’s upper lip reflecting the white cigarette. I NAILED that detail!!! Also for scale reference, Marilyn’s lips are three feet wide!
I also would like the general public to know that I specifically painted this mural knowing it would deteriorate over the years and hoped that younger generations would have to figure out who these ‘celebrities’ were in American history. One side effect I had not planned on was how poignant the digital history would be. If you go look up this address in Google Maps and bring up ‘street view’ you can see the evolution of the resolution of Google’s cameras over the years. The first shot is very low resolution, ironically when the mural looked the newest. And now 22 years later the resolution is much better, but the mural continues to deteriorate, like I planned all along. Fun little fact.
I am honored and humbled that the piece has lasted this long without tagging. In my next post I will go over my airbrush portrait collection briefly to satisfy any more interest. Fun to go over memories of the past.
I saw Golden Today posted a very early picture of the building early in its history HERE.