
Smile… …just a little.


Pushing hard to get through this mixa’ project. Lots of little and big details. Finally finished cutting out all the panels and powdercoating them and screenprinting them. Turning out sharp.

Nice to see the meter bridge turned out just like I wanted it to. I designed it right into the seem to give it a ‘traditional’ mixer look. That section was a bit tricky and required me to spilt the Vector rails laterally. That was fun to do with a routing table.
Rough fitting it into the cabinet where it will rest. I wanted the faders to be illuminated so I would not have to squint to see where they were all at. I now have to move a bunch of euro mixer modules out of my rack to make room for more modules 😀
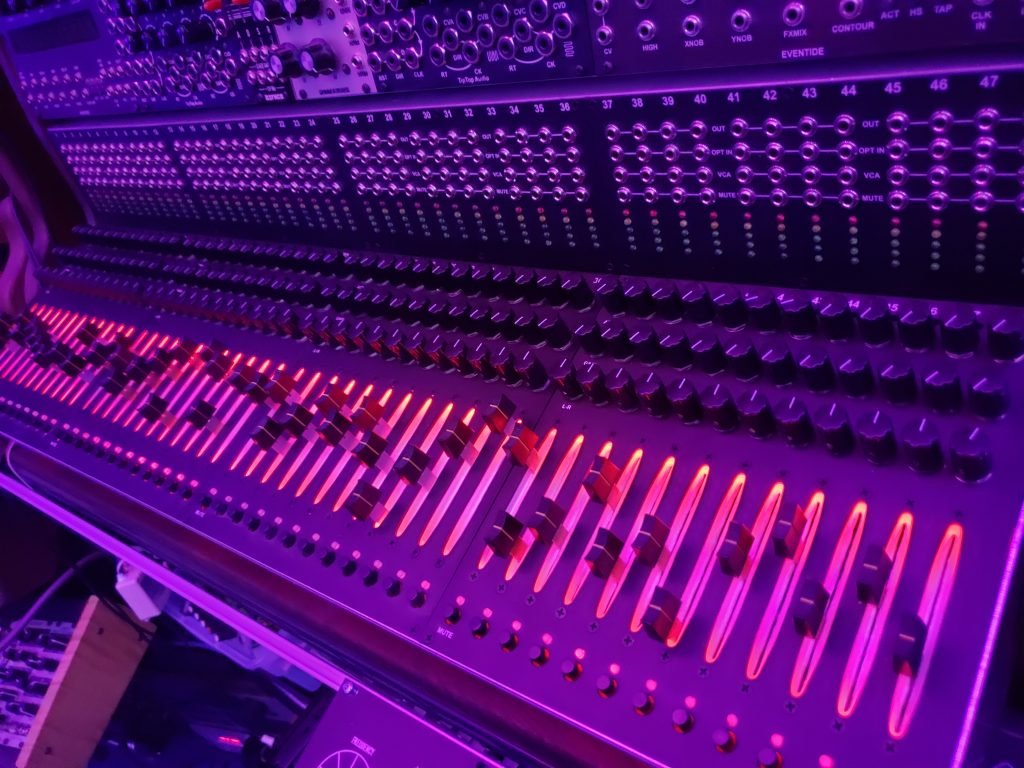
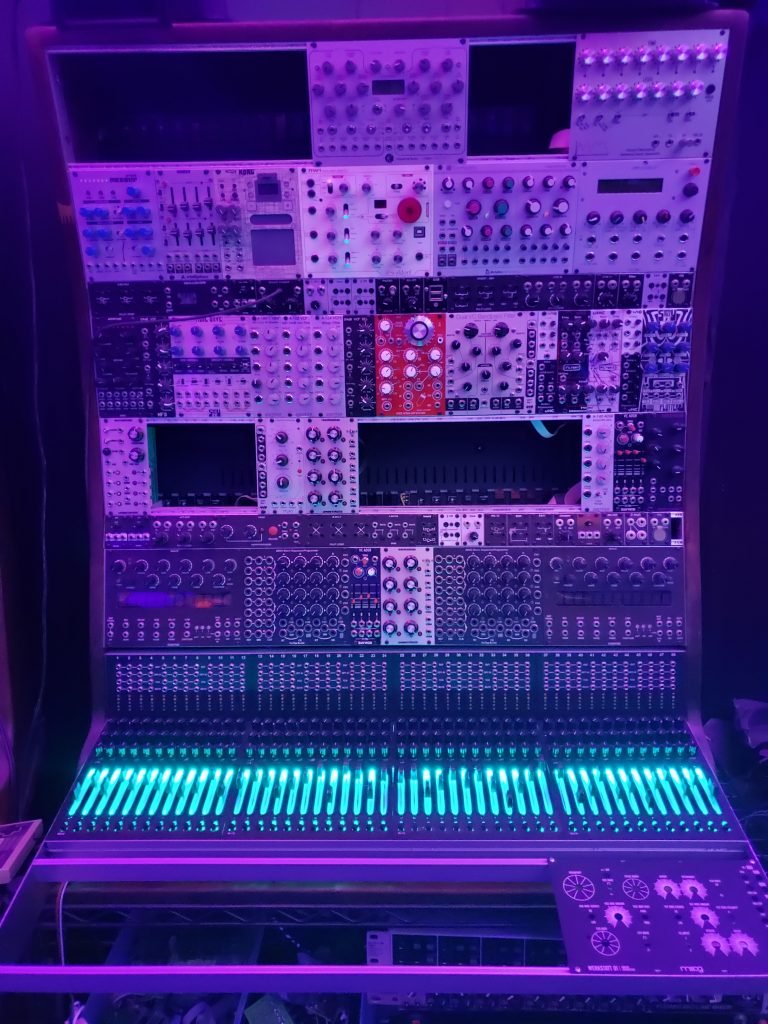

Rough fitting this beast into its final home was fun. I was within 1/32″ of my spec over 30″ wide, so I am very happy. The more I design, build and create the more I find my tolerances tightening up. It’s a great feeling to slide some thing like this right into place.
So the eagle eyed person would recognize the 48 channel strips, but where’s the rest of it?
Yes, I am designing a couple of different sub-mixers now. The first up will be a Quadraphonic sub-mixer module. I have always dreamed about having a dedicated quadraphonic mixer, now I will build it right into my eurorack. Having built these 48 channels separately I can use the row right in front of them for a custom set of sub-mixers and crossfaders!
Lots more work, but now it really is getting fun as I have ‘most’ of the really boring wiring finished and tested. Turning out to be the best Christmas present I have ever received. More to come…
Folktek modules/instruments are unique in their creation from other current eurorack design philosophies. There are strong design elements that are deliberate and there also is a sense of general functionality, but as you use them, your mind wanders easily and you can coax the ‘engineer’ out, to add to and possibly ‘re-design’ the work flow. I only have worked with Folktek eurorack modules so far, but I am always interested with what they come up with.
My initial jump into the Folktek world were acquiring the Conduit and Matter modules. There is now a second version of Matter, but these are the first gen versions. I used the pair in my larger system, for a while, but I found I did not integrate them into my other euro modules as much. The little headers and jumper wires are more familiar territory to bread boards and test benches. Then I started to use the Mescaline system and decided it would be cool to combine those first gen modules into one dedicated system.
Folktek are made with PCB’s as both the front panels and secondary panels. This makes them very light weight. With the popularity of podcasters, the ‘floating’ microphone stands are now pretty cheap. So I fabricated a light weight .050 aluminum bracket. I added an 8 jack breakout box with the corresponding jacks on the frame, allowing signal I/O. The arm is rated for 4-5 lbs and it responds well to moving it around using two hands.

With this flexibility I now find it easier to tweak the pots on the back of the modules. This is something Folktek encourages. Again, this is a different approach from most eurorack module manufacturers.
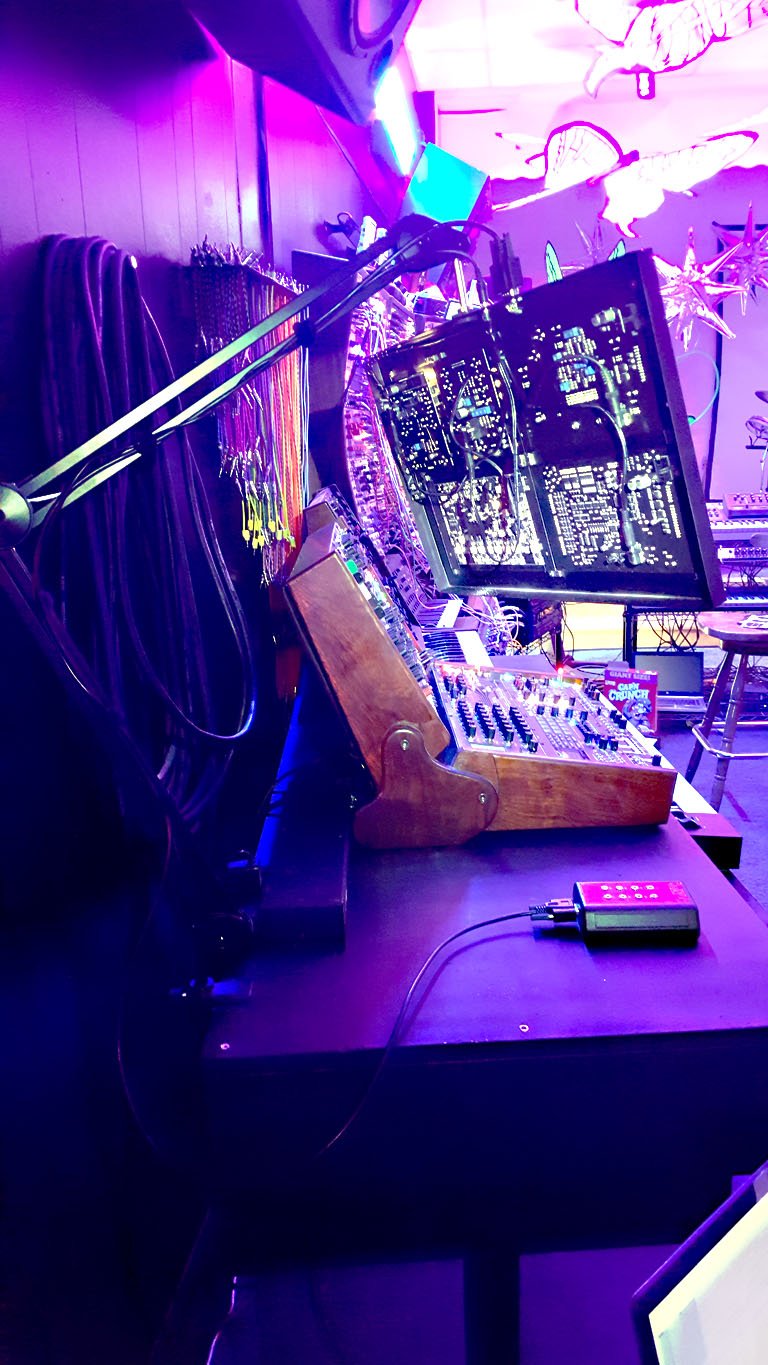
I have found this approach refreshing and unique and allows me to easily jump into the Folktek world. Also as an arm chair engineer, I can test out new components immediately!!! Just don’t forget your small breadboards when you feel the need to make large changes to your patch. They come in very handy.

If there is one area in Eurorack where I find YOU want to really have exactly what YOU want, it’s the mixer. We all seem to need slightly different things. The trick is, you really can’t have EVERYTHING you want. You could, but the mixer component count would be crazy. Heat, noise floor issues, ground plane tweaking and half a dozen other factors have to be considered. So I decided to build myself a custom compact-ish 48 channel mixer with just what I need, in order to keep the component count low, and to keep the troubleshooting down to a minimum. On to prototyping…

Were you one who’s entire life came to a halt in mid March, or were you able to keep most of your life on its semi-standard course?
Well, my wife and I found ourselves completely stopped in our tracks. What to do with all of this free time?
I started this project in November 2019 and didn’t expect to get this far for at least another year. And this has been a VERY challenging year so far.
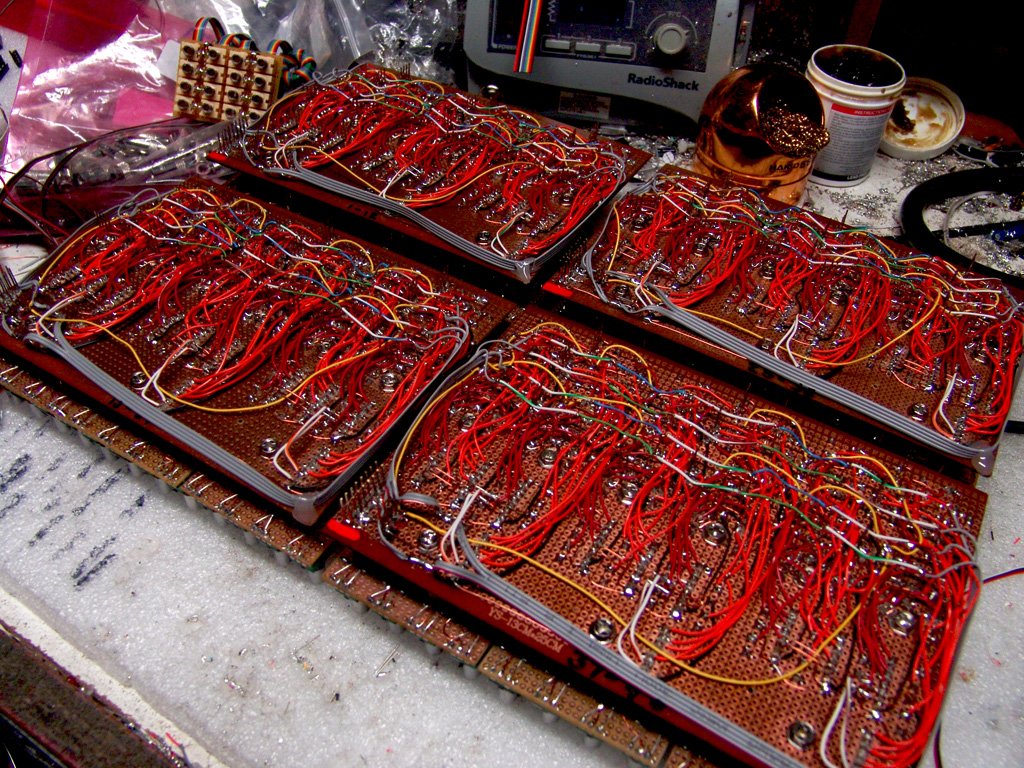
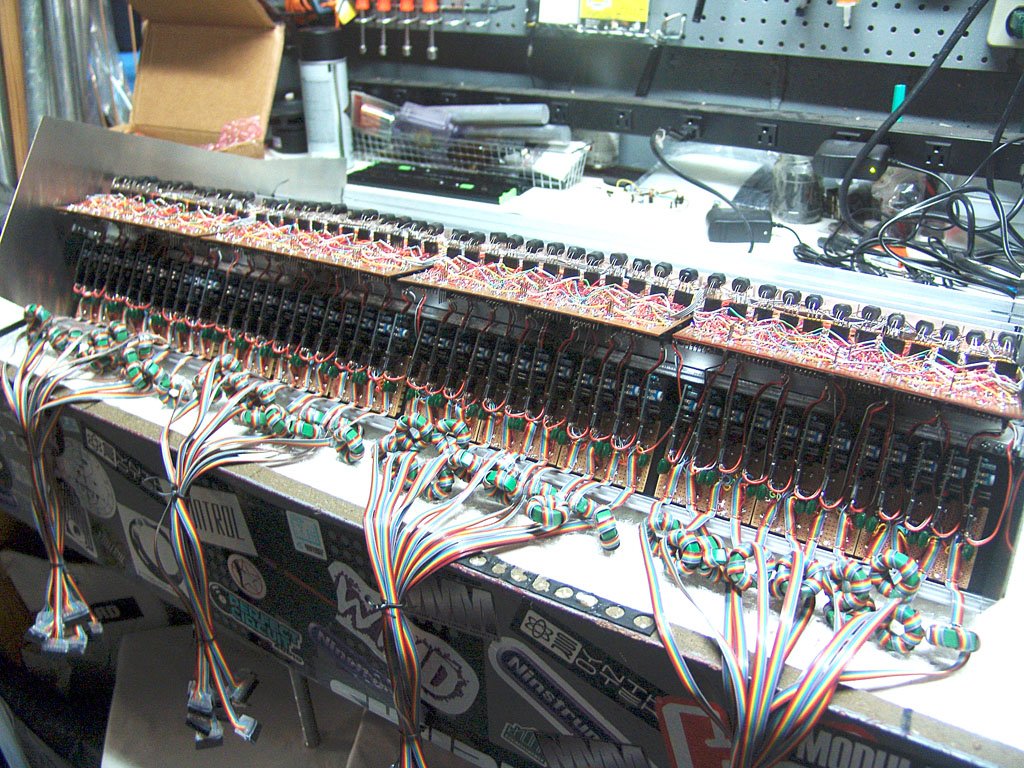
Two solid months of work in the above pic! Anyone for some fresh noodles? I have never done this much point to point soldering in my whole life! So? Why use PTP for this?? you ask.
Continue reading
Hope to have it at the end of the year or sooner!
The empress Reverb is one of the most expressive reverbs, IMHO 😀 So you know where I headed next? Yes, it’s getting to be a repetitive scenario for me, isn’t it? Original Manufacturer’s site is located HERE.

I like this pedal for the simple fact that is NOT the Eventide space. My conversion of that one is HERE. I find it most useful when you are wanting a delicate and diaphanous touch. I usually pair it up with the 4MS Spectral Multiband Resonator.

All circuitry is custom to each conversion and calibrated accordingly. There can be differences between pedals I find. Very unusual for a digital pedal. Conversions can be like that. Each one is unique and satisfying in its own way 😀

I built this custom Korg MS-10 eurorack case four years ago. I knew I wanted to make a flexible and portable case that would hopefully give me enough room for a ‘super’ mono synth of sorts. During these last few years I was able to try out all sorts of modules and configurations. I would like to share some of my insights with you. The saying ‘Iv’e made a lot of special modifications’ goes without sayin’… but you just said it!?! Anyway…
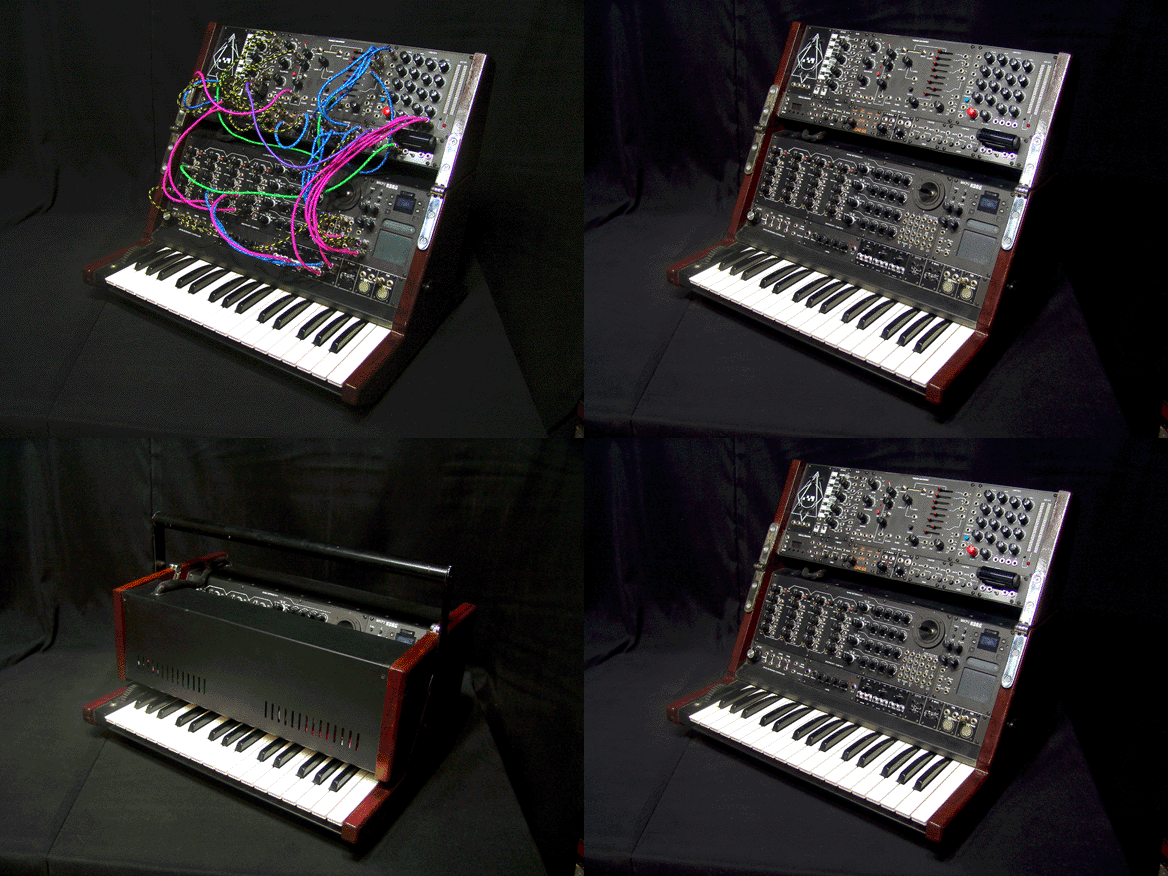
I would say that at least two of those four years were spent in frustration. Some due to my unfamiliarity with the modules and some due to lack of time spent with the interface. What? you ask, it’s a keyboard! Yes and no. With eurorack you can have the keyboard be an odd shaped envelope or event generator or… The possibilities are literally endless. You are not encumbered with time honored traditions or traditional expectations. You build exactly what you want and more importantly, how you want to interface with it. So a keyboard doesn’t have to be just a keyboard 😀
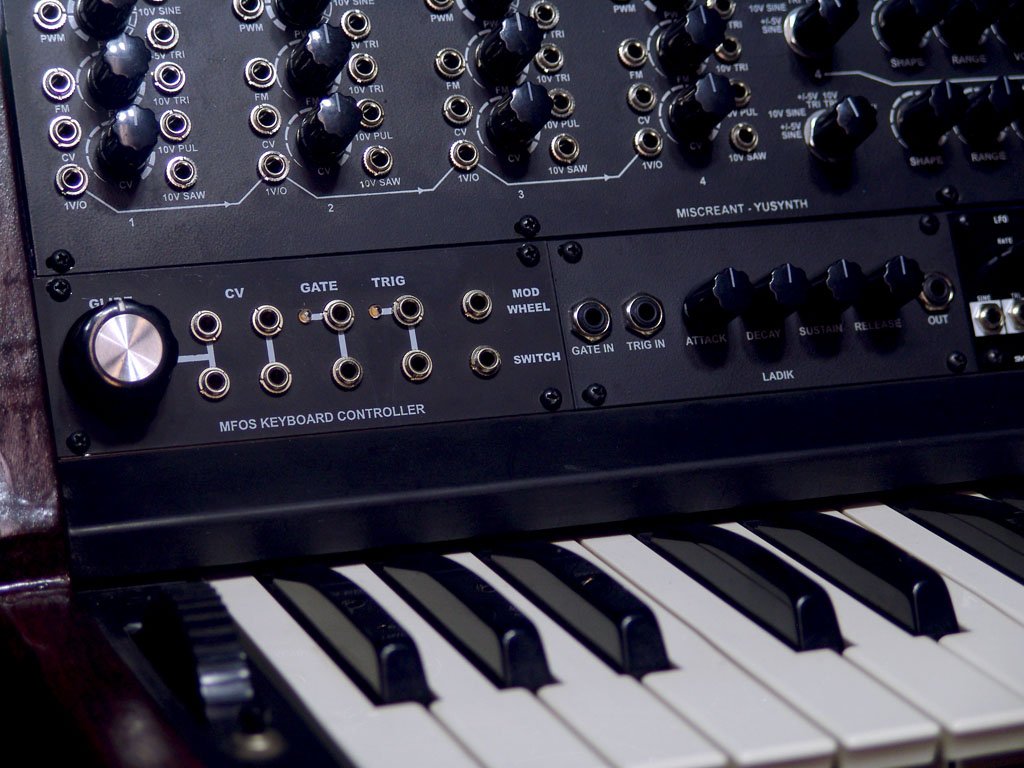
Before he passed away I was lucky enough to correspond with Ray Wilson over at MFOS. He gave me great insight to the operation of his Keyboard controller and how to tune it and keep it tuned. I can’t recommend it enough. It has been the backbone of this converted Korg custom interface. That’s just the start…
Continue reading
Since the CEM3340 chip was put back into production, and after seeing what a few other makers have built with them, I decided it was time for me to come up with my own take on this ‘tried and true’ chip! I looked over the various designs on using the CEM3340’s and settled on the Octoginta II.

Now that the VCO’s were sorted and I was able to purchase the DIY PCB’s, I needed to choose a wavefolder design. I like what Yusynth did with Haible’s wavefolder and went with his design here:
http://yusynth.net/Modular/EN/WAVEFOLDER/index.html
The YuSynth design required me to make my own PCB’s. This can be a laborious process if you have not done it before. But I have the process down to a science here in the lab, so I was able to get these made pretty quickly. Taste the Sodium Persulfate in the air, aahhhhh!

Now you have your DIY modules in your DIY rack, where do you put your cables? If you like the content here at MMM and would like to see more, please consider supporting us by buying a custom made basic eurorack cable stand with heavy base, or a custom cable holder that will fit a standard microphone stand. No crowd funding or Patreon commitment! These are ready to ship NOW!
So you have a little coin left over from all of the DIY projects you have built? Now you need somewhere to put all of those new modules! Again you might be able to save some money if you build your own rack. All sorts of information you now have to be aware of. How much current are you going to use? Do you have lots of power hungry digital modules? I do 😀

Space is also a concern. You always want more HP, but at some point the case or rack just becomes too heavy to even move it around! I just finished this rack. It is 150HP wide, 5-3U and 2-1U. I believe this is as large as you can make it where one person can move it. Any bigger than this it will take two people to move it. I have worked this design for a while now. This is the third version of it.

I packed four PSU’s into this sucka’. So power specs are 16 Amps of +12V, 4 Amps of -12V, and 60 Amps of +5V! I have plenty of one off power crazy modules, so I really have need for this kind of current draw. One of the main trade offs for stuffing that kind of power into a smaller space is heat. You have to deal with that heat, so in this case I incorporated 2-120mm fans. Two fans for redundancy so one can fail and I can still operate on the cool. I kicked down the speed of the fans so they are not going full speed to cut down on the noise.

I added a custom CNC’d vented cover that allowed me to keep the streamlined look. I also added custom 1U power boards that have all of the various power connectors and even a specialized connector that I use for my own custom shit. The more custom stuff you make the more you have a tendency to start your own ideas and roll with your own standards. If you can customize your work space the more natural it feels for your specific work flow. Keep building smarter! 😀
